Learning Center
Conservation
Are Poison Dart Frogs Endangered?
Although no Dart Frogs are currently listed as endangered species and none have been recorded to be extinct, they are threatened.
According to the Global Amphibian Assessment, around 28% of 234 known species of poison Dart Frogs are now threatened with extinction. The main threat to these frogs’ survival is the same as for many other tropical frogs. The Convention on International Trade in Endangered Species treaties listed all species of the Dendrobatidae family (specifically all the species of the Allobates, Dendrobates, Epipedobates, and Phyllobates genera), are now included in the CITES Appendix II. This means that these endangered animals "are not necessarily now threatened with extinction, but have the possibility to become extinct.”
Appendix-II Specimens
1. An export permit or re-export certificate issued by the Management Authority of the State of export or re-export is required. An export permit may be issued only if the specimen was legally obtained and if the export will not be detrimental to the survival of the species.
A re-export certificate may be issued only if the specimen was imported in accordance with the Convention.
2.In the case of a live animal or plant, it must be prepared and shipped to minimize any risk of injury, damage to health or cruel treatment.
No import permit is needed unless required by national law.
Article IV
Regulation Of Trade In Specimens Of Species Included In Appendix II
1. All trade in specimens of species included in Appendix II shall be in accordance with the provisions of this Article.
2. The export of any specimen of a species included in Appendix II shall require the prior grant and presentation of an export permit. An export permit shall only be granted when the following conditions have been met:
(b) a Management Authority of the State of export is satisfied that the specimen was not obtained in contravention of the laws of that State for the protection of fauna and flora; and(c) a Management Authority of the State of export is satisfied that any living specimen will be so prepared and shipped as to minimize the risk of injury, damage to health or cruel treatment.
3. A Scientific Authority in each Party shall monitor both the export permits granted by that State for specimens of species included in Appendix II and the actual exports of such specimens. Whenever a Scientific Authority determines that the export of specimens of any such species should be limited in order to maintain that species throughout its range at a level consistent with its role in the ecosystems in which it occurs and well above the level at which that species might become eligible for inclusion in Appendix I, the Scientific Authority shall advise the appropriate Management Authority of suitable measures to be taken to limit the grant of export permits for specimens of that species.
4. The import of any specimen of a species included in Appendix II shall require the prior presentation of either an export permit or a re-export certificate.
5. The re-export of any specimen of a species included in Appendix II shall require the prior grant and presentation of a re-export certificate. A re-export certificate shall only be granted when the following conditions have been met:
(a) a Management Authority of the State of re-export is satisfied that the specimen was imported into that State in accordance with the provisions of the present Convention; and(b) a Management Authority of the State of re-export is satisfied that any living specimen will be so prepared and shipped as to minimize the risk of injury, damage to health or cruel treatment.
6. The introduction from the sea of any specimen of a species included in Appendix II shall require the prior grant of a certificate from a Management Authority of the State of introduction. A certificate shall only be granted when the following conditions have been met:
(a) a Scientific Authority of the State of introduction advises that the introduction will not be detrimental to the survival of the species involved; and(b) a Management Authority of the State of introduction is satisfied that any living specimen will be so handled as to minimize the risk of injury, damage to health or cruel treatment.
7. Certificates referred to in paragraph 6 of this Article may be granted on the advice of a Scientific Authority, in consultation with other national scientific authorities or, when appropriate, international scientific authorities, in respect of periods not exceeding one year for total numbers of specimens to be introduced in such periods.
Article VI
Permits And Certificates
1. Permits and certificates granted under the provisions of Articles III, IV, and V shall be in accordance with the provisions of this Article.
2. An export permit shall contain the information specified in the model set forth in Appendix IV, and may only be used for export within a period of six months from the date on which it was granted.
3. Each permit or certificate shall contain the title of the present Convention, the name and any identifying stamp of the Management Authority granting it and a control number assigned by the Management Authority.
4. Any copies of a permit or certificate issued by a Management Authority shall be clearly marked as copies only and no such copy may be used in place of the original, except to the extent endorsed thereon.
5. A separate permit or certificate shall be required for each consignment of specimens.
6. A Management Authority of the State of import of any specimen shall cancel and retain the export permit or re-export certificate and any corresponding import permit presented in respect of the import of that specimen.
7. Where appropriate and feasible a Management Authority may affix a mark upon any specimen to assist in identifying the specimen. For these purposes "mark" means any indelible imprint, lead seal or other suitable means of identifying a specimen, designed in such a way as to render its imitation by unauthorized persons as difficult as possible.
Although all species on DFC website are captive bred, we are aware that wild caught animals legally imported into the states are prevalent in the hobby trade.
All written content of the DFC Learning Center is gathered from various readings, forums, websites, Dart Frog enthusiasts, hobbyists, the Dart Frog community and our own DFC Dart Frog specialists. Please share any content from the DFC Learning Center freely, to further the education and knowledge of Dart Frogs.
Thank you,
- The DFC Team
What Is A Dart Frog?
The Dart Frog also known as the Poisonous Dart Frog (dart-poison frog, poison frog or formerly poison arrow frog) is the common name of a group of frogs in the family Dendrobatidae. The families are native to Central and South America. All dart frogs are diurnal, meaning that they are active during the daytime.
Dart frogs are known for their bright, colorful bodies and their unique social behaviors. There are over 250 different species of Poison Dart Frogs. Records have indicated that these Dart Frogs can be found throughout parts of Central and South America, especially south of Nicaragua and the Guiana Shield. This includes the Venezuelan Tepuis, Colombia, Chocoan, and Ecuador. Species richness is particularly high in Pacific Colombia, Panama, Costa Rica, Andean Colombia, and the east-Andean foothills of Ecuador and Peru. They are also predominant throughout the entire Amazon basin.
The name Poison Dart Frog is derived from usage by the Choco Indians of Colombia. They use a couple of species in the Genus Phyllobates to poison their darts that were used for hunting and warfare. Approximately 1/3 of all poison frog species posses potent toxins. They use this to defend against their natural predators in the rainforest.
Only three species are known to be fatal to humans. Phyllobates terribilis is the most commonly utilized species for this purpose. They have enough toxins in their skin to kill several adult humans. The Natives capture the Dart frogs and rub their darts on the back of the frog until they have obtained enough secreted mucus from the Dart Frogs on the dart. Another method used to collect the poison, is by cooking the Dart Frog.
In The Wild:
In the wild, Dart Frogs get their poison from the diet of certain ants and insects rich in toxic alkaloids, which aid in the dart frogs’ toxin production. These toxins protect them against their predators. Their bright and bold colors serve as a warning sign to other potential predators. The complexity of toxicity in their skin still baffles scientist. Their poison contains neurotoxins that attack the nervous system of their victim almost instantly. It also can attack the muscular system, which can cause permanent muscular paralysis. In the wild all Dendrobatids have toxins, however levels of toxicity vary considerably from one species to the next and from one location of one population to another.
Dart frogs vary in sizes and live in diverse rainforest environments. They can be either terrestrial, which means they live on the ground; or arboreal, which means they live in the canopies or tops of trees in the rainforest. They are very agile and can maneuver themselves around the forest floor or the top of the trees effortlessly. Most of the Dart Frog species are small, less than 1/2 inch, few larger groups that can grow up to nearly 2 1/2 to even 3 inches in length.
Social Behavior:
All dart frogs have very well developed social and reproductive behaviors. Each species share its own call and complicated, elaborate courtship and mating behavior. The Dart Frogs are dedicated parents and express great, complex parental care to their young. Species of Dart Frogs in the Oophaga genera carry their newly hatched tadpoles on their back. Their tadpoles stick to the mucus on the backs of the parents, preventing them from falling off. This is a fascinating site to see. Once in the upper reaches of the rainforest trees, the parents deposit their young in the pools of water that accumulate in epiphytic plants, such as bromeliads. The tadpoles will then be supplemented by the mother depositing unfertilized eggs into the water for the tadpole to digest.
Other poison frogs lay their eggs on the forest floor, hiding them beneath leaf litter. Poison frogs fertilize their eggs externally. The female lays a clutch of eggs and the male fertilizes them afterwards. Poison frogs can often be observed clutching each other, similar to the manner most frogs copulate. Some have mistaken this as a mating behavior. These demonstrations are actually territorial wrestling matches. Dart Frogs often fight and dispute over territory. A male will fight for the most prominent roost to broadcast his mating call from. Females will fight over desirable nests, and even invade the nests of other females to devour competitor's eggs. Their social behaviors are very complex. This is one of the many reasons that Dart Frogs are so loved by the hobbyist and still studied by all today.
In Captivity:
In captivity, Dart Frogs never develop any toxicity and even wild caught animals will lose their toxicity after a period of time in captive conditions.
Although they have lost their toxins, these “Jewels Of The Jungle” are best kept and enjoyed without touching. The stress of handling can lead to death to the frog.
To keep Dart Frogs, you must be a plant lover. They will live together in perfect harmony in a well-planted vivarium. It is literally having little pieces of a natural rainforest in your possession. Many different plants from Ferns, Orchids, Carnivorous plants, Epiphytes, Peperomia and others, can be planted in a vivarium.
Once you observe their personalities and their unique social behavior. You will be as hooked as we are.
All written content of the DFC Learning Center is gathered from various readings, forums, websites, Dart Frog enthusiasts, hobbyists, the Dart Frog community and our own DFC Dart Frog specialists. Please share any content from the DFC Learning Center freely, to further the education and knowledge of Dart Frogs.
Thank you,
- The DFC Team
Intro To Dart Frogs
Because of its unique beauty and the success of keeping these remarkable and colorful amphibians in vivarium over many years, Dart Frogs (also known as Dendrobates Auratus) have been popular with the hobbyist for some time now. With better understanding of the Dart Frogs natural habitat, today’s hobbyists are able to keep Dart Frogs in captivity with even greater enjoyment and success.
Dart Frogs are commonly known to be poisonous. In the wild, they consume a combination of wild insects that help their toxin production. These toxins are secreted through the mucous on their skin as a defense mechanism. While captive, Dart Frogs never develop toxicity -- In fact, most wild animals will lose their toxicity after a short period of time in captivity. Scientific studies have shown that the lifespan of a Dart Frog in the wild ranges from 1 to 2 years. Now, through successful captive breeding conditions and programs, they have been reported to live as long as 25 years -- However their average life span in captivity is 7-10 years.
Although they have lost toxicity while captive, Dart Frogs are better enjoyed with your eyes and not your hands. The stress of too much handling can lead to bacterial infections, illness and even death to the Dart Frogs.
The majority of Dart frogs originate from a warm, humid tropical rainforest. Their natural habitat can range from lowland forest, 2,000 feet below sea level up into the dense forest; to 6,500 feet above sea level. In general, most species of Dart Frogs can be kept in a similar vivarium set up by the hobbyist -- but keep in mind that some species can have specific requirements to meet their needs.
Captive Bred (CB) Versus Wild Caught (WC) Dart Frogs
Dart frogs that are bred in captivity are referred to as captive bred. Although both types of frogs are common in the hobby, at DFC we recommend hobbyists to always seek out captive bred frogs. CB frogs tend to have fewer parasites and fungi issues. They are often healthier, stronger and are bolder and less shy in your vivarium. Often times, wild caught animals are imported illegally and their survival rate is lowered due to the stress of international shipping, overcrowding during transportation and their illegally smuggled tactics. WC animals can carry their own pathogen that can infect your existing collection with bacteria and other diseases they may be carrying from the wild. Buying CB species can help to continue the preservation of the wild population of the Dart Frogs in their natural environment.
Quarantine And Introducing A New Dart Frog:
There has been a lot of discussion by hobbyists, whether or not newly bought CB Dart Frogs, would still need to be quarantined. In general, any new animals can introduce new pathogens and bacteria into your already established collection. DFC does recommend that you take all precautions like washing your hands before handling each frog. Remember, any disinfectant and anti-bacterial/sterilizer residue left on your hand, can also harm the Dart Frogs. Make sure that your hands are 100% free of these chemicals before handling them.
The hobbyist often practices full quarantine. Keeping your new animals completely separated from your other animals for an extended period of time does this. This precaution is highly recommended when you are introducing a newly purchased Dart Frog into a vivarium with the Dart Frogs you already have. Keeping the newcomer in a simple set up tank or shoebox with moist sphagnum moss, a couple of large magnolia leaves and a water dish will suffice. The goal is to observe the newcomer on its food intake and that it is gaining proper weight. Make sure it is thriving, healthy and clear from any bacterial infections or any other health problems before introducing it into your pre-existing vivarium. The quarantine period should be no less than 3 weeks. Don't rush this quarantine period -- its sole purpose is to protect your existing collection.
Keep in mind that Dart Frogs are very territorial. They develop a social structure in their living environment. Observe carefully when introducing a new Dart Frog to the pre-existing population. If fighting persists, eating behavior declines and signs of stress develop, remove the new Dart Frog from the population immediately. This might reset the balance of the social structure of your Vivarium.
Another method used to introduce a new Dart Frog into the existing population, is by changing up the existing habitat. Remove all the frogs from the existing habitat and quarantine them. Then, simply give the existing habitat a spring-cleaning. Rearrange the wood logs, coconut huts, water bowl, etc. Trim the plants, add more dry oat leaves, magnolia leaves or add even more plants. Next, add the new Dart Frogs into the vivarium at the same time as the existing collection. Observe them like before, to make sure all the Dart Frogs coexist peacefully.
If you are simply introducing the new Dart Frog into a new habitat of its own, make sure the Vivarium or any other kind of habitat has settled down and has reached its equilibrium. Newly established tanks have to go through a period of adjustment before it is ready for the Dart Frogs. If the new habitat is not yet ready, simply set up the quarantine tank described above to house the newcomer until the habitat is fully established. Be patient.
Lighting:
Lighting is not necessary for the Dart Frogs themselves, but it is essential for the health of plant growth in the habitat/vivarium. Only a balanced equilibrium in the habitat will yield healthy Dart Frogs. Lighting will also have physiological effects for hobbyists that are interested in breeding Dart Frogs.
Fluorescent grow bulbs or LED lights are best suited for Dart Frogs. They produce minimal heat and can provide the light spectrum that your plant growth needs. We do not recommend any incandescent light bulbs and fixtures that can produce a lot of heat. Remember, over heating will kill your Dart Frogs. Many hobbyists have optioned to add small computer fans to their vivarium, to keep the tank from over heating and to provide some added air circulation.
The lighting spectrum for the best plant growth ranges from 5000K to 6700K.
Lamps that are suitable for all Dart Frog habitats and are highly recommended by DFC are:
The lighting spectrum for the best plant growth ranges from 5000K to 6700K.
- Exo-Terra Repti Glo 2.0 Fall Spectrum Terrarium Lamps
- Repti Glo 5.0 Tropical Terrarium Lamp
- Zoomed's Tropical Sun 5500K Daylight Ultra Sun Trichromatic Super Daylight.
- Flor Sun Maximum Plant Growth
These lights can be used in combination. UVB spectrum lights can be beneficial for your Dart Frog's developmental growth. Keep in mind that lighting fixtures can raise up the heat in your habitat an extra 5 to 10 degrees. An additional cooling fan may be an option for canopy cooling to maintain the temperature your Dart Frogs need.
Water And Misting:
Tap water in the United States has added Chlorine. De-chlorine chemicals are necessary to treat all water that will be used with Dart Frogs. This includes water used for misting their habitat.
Once the Dart Frog tadpoles morph into frogs, they can't swim. They can drown in large, deep-water pools. DFC does recommend a water dish in the habitat. Some species will wrestle and fight for territory establishment, so make sure the water is shallow enough for the Dart Frog to get in and out with ease to ensure they do not drown. Change the water daily to keep it fresh. Some hobbyists like to add water features into the habitat, so the same rules apply. Make sure the water gathering pool is shallow and the water flow is slow so it’s a stress free environment for the Dart Frogs.
Although both reverse osmosis and distilled water are perfectly suited for your Dart Frogs, they are filtered and lack the minerals that can benefit your Dart Frogs' growth. Supplements like Tannins, liquid Vitamin D, black water, and indian almond leaves can be added back into the water to reintroduced the healthy minerals. These supplements can also aid in bacteria growth prevention and lower the pH.
Misting can be done by hand with a misting water bottle or can be accomplished with misting kits like Mistking or Exo Terra Monsoon System. Both are equipped with timer and frequency settings to perform an efficient misting job. Only mist one to two times daily, in the morning and if necessary the late afternoon to simulate the rainforest. The Dart Frogs need humidity, but do not thrive well when the habitat is soaked. Over misting can cause bacterial and respiratory infection in some species and is a common mistake made by many hobbyists.
All written content of the DFC Learning Center is gathered from various readings, forums, websites, Dart Frog enthusiasts, hobbyists, the Dart Frog community and our own DFC Dart Frog specialists. Please share any content from the DFC Learning Center freely, to further the education and knowledge of Dart Frogs.
Thank you,
- The DFC Team
How to Make a Terrarium/ Vivarium For Your Dart Frogs
A vivarium is a closed container that keeps and raises animals and plants for observation. It is a mini ecological system. It is different from a terrarium, which does not house any animals - just plants. When discussing the Dart Frog's habitat, hobbyists often accept both terms.
There are many different types of vivarium on the market; however, there are fundamentally three types of vivarium specifically for Dart Frogs. It is important to know which type of Dart Frogs you desire, so you can build the most suitable vivarium for them.
Type 1. The High Rainforest Vivarium
These tanks are taller than wider. It is made for more arboreal species.
The arboreal Dart Frog species lives in forest trees. Many of them live in the canopy of the rainforest. Some never even touch the ground. In this habitat, taller branches and plants should be placed, providing lots of climbing surfaces for the Dart Frogs that will live in this ecosystem.
Bromeliads are a must in this system. Plant them throughout the habitat at different heights. They will serve as water gathering devices. Many species will pick the Bromeliad's leaves for laying eggs. Later, they transport the tadpoles into the cup of Bromeliads to raise them.
Type 2. The Terrestrial Rainforest Vivarium
These types of vivarium are designed for species such as Dendrobates or Phyllobates, which are ground dwellers. They spend most of time foraging in the dense rainforest floor. The ground of this vivarium needs much more attention. A layer of leaf litter and large magnolia leaves to provide ample hiding shelter is required. A half coconut hut is a great option for shelter. Setting a water dish or pond area is also needed but remember that once the tadpoles morph into frogs, they cannot swim. They can drown in large deep-water pools. DFC recommends a water dish in this habitat, but some species will fight for territory establishment, so make sure the water is shallow enough for the Dart Frog to get out. The ground can be covered with Riccia moss, java moss or Peperomia.
Type 3. The Running Stream Vivarium.
This style of vivarium is especially designed for Dart Frogs that require flowing water to stimulate their reproduction. The set up is very similar to the Terrestrial Rainforest vivarium but has an added feature of streaming water. This can be accomplished by using a small pump to create the water circulation. This type of tank is by far, the most popular with hobbyists. It is like having a rainforest in your possession.
This vivarium should be well planted with vertical and ground covering vegetation. Introducing lots of ferns, Bromeliads, and moss into this ecosystem will surely produce an amazing habitat that is not only great for the Dart Frogs, but also visually beautiful for the hobbyist. The rule of shallow water applies to this vivarium as well.
Construction:
This is only one example of many background building techniques. Many hobbyists have developed different approaches. You can find them on lots of Dart Frog forums such as Dartfrogz.com and Dendroboard.com. DFC uses this technique because the result is truly organic and resembles the Neotropical jungle that the Dart Frogs are from.
No matter which style of vivarium you choose to build, the overall concept remains the same.
First, pick the size of the tank. DFC is a strong supporter of Exo Terra terrarium. The double door opening makes it easy to feed the frogs and harder for the frogs to escape. There are a variety of sizes and options to choose from. Empty tanks or stylized Habitats can both be purchased on our website. If you pick the empty tank option, DFC has put together DFC Habitat kits for your convenience.
Our goal in building a vivarium is always making it as natural as possible while creating an ecosystem that will best suit the Dart Frogs.
Using Hydronic To Create The Bottom Of Vivarium
A: Start From The Back
There are a couple of approaches to creating the background. The simplest is using ExoTerra Background. The second is a more popular hobbyist approach that is to create your own background by using "Great Stuff".
These are the supplies you will need to get started:
1. Great Stuff Pond & Stone Foam Filler DFC recommends this product over the regular " Great Stuff " because it is fish & plant safe.
2. GE Silicon II Window and Door Silicone E5080 There are many window sealers on the market. DFC believes that this is by far the best product. It is flexible when dry and has a fast curing time.
3. Caulking Gun for your GE Silicon II Window and Door Silicon E5080
4. Disposable gloves it can get messy. Great Stuff doesn’t come off your hands easily. Take the precaution and wear gloves. You will thank us later.
5. DFC Background Mix consists of ground up various moss, fern, and spores. Our custom mixture promotes moss growth on your back wall.
6. Various barks, grape vines and cork flats Pick from various shapes and sizes to create your ecosystem.
7. Net caps These caps are used to hold your plants or wood branches.
Begin your project by selecting the proper size of the Exo Terra Glass Terrarium that fits your frogs’ needs. Clean out the tank with rubbing alcohol. Any dust or residue left on the glass from the manufacture may hinder the adhesiveness of the "Great Stuff."
Make sure you are prepared to make a mess. Cover your working area with newspaper. Have a Shop-vac on standby.
Carefully place your clean, empty tank on it's back. Prop open the two doors. Be careful not to let the door just swing open without proper support. The glass doors can easily break and pop off its joint.
With your tank in place, you get to start the creative process of placing your barks, corks, net caps etc.
Create depth by using different sizes and different types of wood. Keep in mind which kinds of plants you would like to grow in your vivarium, and how much of the background you would like exposed and what area you will want to be covering with live moss. The possibilities are endless. Also remember that the bottom of the vivarium will be covered with the substrate; therefore it is not necessary to create the background all the way to the bottom of your vivarium.
This is also the time to think about where you will be placing your Bromeliads. Many hobbyists make a common mistake by using Net Caps to hold them up when the Net cap is placed in an angle. If Bromeliads are not planted vertically, it will not get proper drainage and may rot and die. A Bromeliad is an Epiphyte and does not require soil to grow, but they do need proper drainage. We find it helpful to create shelves and protrusions in the background design to allow the Bromeliads to be able to stand and grow vertically. Plan your Net Cap's purpose accordingly.
Once you are satisfied with your placement of everything, put your gloves on and begin the process of foaming. Remember that if you decide to use Net Caps, it is important to make sure there are holes to allow drainage. This can be easily achieved by using drinking straws or even an air line tubing for aquariums. To prevent clogs the opening of the straws or tubing, you can put some tape at the top of the opening and cut off the excess when the foaming is dry.
"Great Stuff" requires shaking before using. Carefully foam beyond and between the placement of the wood, barks, corks etc. Put a little pressure on the wood against the glass to help secure attachment to the glass. The foam will expand and you do not need to over foam to cover the background. Over foaming will only cause the drying time to be longer. By moving the Great Stuff around while wet, you can create caves and valleys in your vivarium.
After foaming has been completed, let the tank rest for a few days. The foam needs some time to cure. You may need to go back and add more foam to make areas more secure or to fill any gaps that may have opened up during drying time. Fill all cracks between the glass and foam, so animals or feeder insects won’t find their way behind them. You can even foam in more wood or bark if you desire.
After a few days, check on your foam. It should be cured and dry. You can shave away any excess foam easily with a serrated knife. Create more shapes by cutting away at the cured foam. Cut off the top of the straws or air line tubing to insure drainage for the plants. Vacuum and remove away any excess foam out of the tank. Have a last look at your creation and if this is to your satisfaction, you are ready to apply the DFC background mix.
Put on a new pair of gloves. Have your GE Silicon II Window and Door Silicone E5080 loaded into the caulking gun. Press on the gun to release the silicone onto the foam. Smear the silicon with your gloved hand. Work on small areas at a time. The silicon dries very fast. Apply dry DFC background mix by pressing it into the silicon. Work this process over and over until the entire foam area is completely coved. Let it set to dry for at least a day. After drying time, vacuum out any excess DFC background mix. If any area of the foam is exposed, repeat the process of applying DFC background mix to the surface again.
Allow your creation to set, rest and completely air out. Silicon contains chemicals that are harmful to plants and Dart Frogs. You need to allow the proper time to air it out completely. This can take up to a week or two depending on the humidity in the air. Be patient. It's worth it for the health of your animals. Once the vinegar smell dissipates, you are now ready for the next process.
Once your background is 100% settled and has had enough time to air out, you can begin the process of building the base layer of the vivarium.
B: Base Layers
A successful balanced ecosystem relies on proper drainage in the vivarium. Plants and animals need this balance in order to maintain their health. To build a foundation of good drainage is the key to a healthy vivarium. Over-watering is the leading cause of plant death. It is important to keep the soil from becoming saturated or soggy. Soggy soil can develop bacteria infections in your Dart Frogs.
The layering technique of various substrates will allow us to mimic the natural leaching process that happens in the rainforest.
One Layer At A Time
Start From Bottom Up:
Hydroton: 2 Inches Minimum Layer Of Hydroton
This is a unique lightweight expandable clay aggregate (LECA). It is ecologically sustainable as it is derived from a plentiful source - clay. The clay is formed into pellets and fired in 1200 degrees rotary kilns, which causes the clay to expand inside like popcorn. This makes it very porous. Advantages of Hydroton include free draining qualities, PH Neutrality, and a reduction in mix compaction. Hydroton is dust free and inert while promoting good oxygen levels at the root zone.
Substrate Barrier:
The Exo Terra Bio Drain Terrarium Draining Mesh is part of the Bio Drain Terrarium Draining System. This non-toxic mesh will keep the underlying Draining Substrate separated from the decorative terrarium top-layer substrate. It also allows proper water drainage.
DFC Mix: 3 Inches
Dart Frog Connection formulated all natural pH balanced mix that is engineered to drain more efficiently and prevent acidity build up and bacteria growth. The mix consists of Panda Moss, Bamboo charcoal - which is much greener than the traditional charcoal commonly used in the hobby, Tree fern fiber and firm bark. Panda Moss is collected in the region where Panda bears reside. This signature moss to DFC is more pH balanced than the long sphagnum moss. With the equivalent draining quality and anti-bacterial/anti-fungal properties, this moss provides a perfect environment for growth of microfauna. This signature new formula rivals the popular ABG mix.
Leaf Litter: 1 Inch
Combination of Oat leaves and Magnolia can be used to top off the last layer of the substrate bottom. Leaves serve a couple functions in your habitat. It is a hiding place for the Dart Frogs to lower their stress level and they also break down slowly over time, providing organic food to isopods and other microfauna that live in the habitat.
With these layering systems, by the capillary action, the misting water will slowly wick its way back into the DFC mix offering moist conditions for the plants while the rest can evaporate. DFC mix will hold on to the moisture to provide humidity without over saturation. These layers create spaces for microfaun cultivation. Making sure only 1 inch of water is in the Hydroton layer, allow the moisture to continue to evaporate, maintaining the humidity. Good bacteria will thrive in this condition keeping the vivarium ecologically balanced and your Dart Frogs healthy.
C: Planting
Having Fun From The Top Down:
Planting your vivarium is like creating your own rainforest. Let nature inspire you. As you plant the vivarium think about the composition. Try to place larger plants in the back and smaller plants in the front. Look at the scale of your vivarium in comparison to the plants you are choosing. Find plants that are terrestrial for the bottom of the tank. Create a focal point. Perhaps it is the rarest fern that will take the center of the attention or your favorite Bromeliad will be the stand out. Utilize the Epiphytic species to accent your habitat. Riccia or Java moss makes great ground covering. There isn’t a wrong way to do this part. Just keep in mind what species of Dart Frogs will be occupying the habitat and plant accordingly.
No matter which style of vivarium you wish to build for your Dart Frogs and how you decide to plant your vivarium - be creative, imaginative and have a lot fun in the process.
D: Time For Bugs
Final Touches:
After you have finished planting your vivarium, add some isopods. They will kick-start the habitat to help build up good bacteria so it reaches an ecological balanced equilibrium. This process takes time. Be patient and allow it to rest and set for a couple of weeks. Observe to see if any plants die. Remove them and adjust any position of wood if necessary allowing light distribution. Mist the tank as if the Dart Frogs are already residents. Monitor the temperature and humidity daily. When everything is perfect, it is time for Dart Frogs to move into their new home.
Overall, we just want to encourage you to build a vivarium that will be is easy to maintain, mimic nature and create a healthy habitat for your Dart Frogs.
All written content of the DFC Learning Center is gathered from various readings, forums, websites, Dart Frog enthusiasts, hobbyists, the Dart Frog community and our own DFC Dart Frog specialists. Please share any content from the DFC Learning Center freely, to further the education and knowledge of Dart Frogs.
Thank you,
- The DFC Team
Caring For Dart Frog Eggs, Tadpoles, to Froglets
Except for Obligates, care for Dart Frog eggs to tadpoles is generally the same. Depending on the species, Dart Frogs reproduce by laying eggs on either the leaf of a plant (i.e. Bromeliads), in a dish, in a coconut hut or on leaf litter in their habitat. The eggs are then developed into the aquatic larvae form that we call tadpoles. Over time, the tadpoles develop back legs, and then front legs then finally absorbing their tails to emerge out of the water and successfully become a froglet.
Gathering The Eggs
Depending on the species of the Dart Frogs, their egg clutches can vary from 2 to 3 eggs to a few dozen eggs in one single clutch. A healthy, prolific, breeding pair of Dart Frogs can lay up to a single clutch of eggs a week, all year round.
It is not always easy to find the eggs of some smaller Dart Frog species. Some arboreal species can lay their eggs on the vivarium glass wall, so keep an eye out for them.
A protective gel surrounds the eggs laid by the Dart Frogs. This gel is also the adhesive that holds the eggs to the surface that it is attached to. To remove the eggs, a simple flat tool like a spoon, small knife or a razor blade will do. If your Dart Frogs have laid their eggs in the film canister or petri dish, remove the canisters or the petri dish from the vivarium and use your tools to remove the eggs.
The goal is to transfer the eggs into a clean petri dish.
Transferring The Eggs
First, moisten the new petri dish by using 10 oz. Reverse Osmosis water or de-chlorinated water. (Do not moisten after the eggs have been placed into the dish. The simple action of spraying the eggs can puncture the Dart Frog eggs.) Gently cut the eggs away from the surface that it is attached to. Place the eggs in the fresh, moistened petri dish. Make sure the dark side of the eggs is facing up. It is important to remember not to drown the eggs in water. The top of the eggs should be above the water. Cover the petri dish to keep in the moisture in. It is a good idea to date and label your petri dish so you can keep a track of the eggs’ development. Keep the eggs at a 70-degree range. Lighting is not necessary. Egg development will vary depending on the temperature. Depending on the species, if the eggs are fertilized, they will hatch at different rates.
Unfertilized eggs will turn white and get moldy. We recommend removing the bad eggs if it can be done without harming the good eggs that are developing.
Be patient as you watch the eggs develop. Do not move them or disturb them. When viewing, refrain from opening the cover of the petri dish. It will let moisture out and bacteria or pathogens in. In the developmental process, the eggs will turn from a sphere form to the shape of a tadpole. The tadpole grows as the yolk slowly shrinks. A healthy egg will turn into a fully developed tadpole that will be fully visible in the egg. You will also observe wiggle movements as the tadpole develops. Depending on the temperature and species of the Dart Frogs, a healthy egg will hatch in approximately 14-21 days.
Tadpole Care
When it’s time to hatch, the tadpole will wiggle itself out of the curled position to straight position and pop open the protective gel to emerge.
At first, the tadpole may seem to be lifeless. It is alive. It has to finish its final process of absorbing the yolk. It can be energy consuming for the little tadpole.
Not often, but at times you may need to help the tadpole to pop open the gel if the tadpole has fully absorbed its yolk sack and still unable to escape. Simply use a razor blade and cut a little opening to help it emerge.
It can take up to 2 to 3 days for the tadpole to absorb its yolk sack. When it is ready, carefully removed the tadpole and move it into a 16 oz. plastic cup with approximately 10 oz. Reverse Osmosis water or de-chlorinated water. The water level is kept low at this time to allow the tadpole to reach the surface easily to get air. Add a quarter size piece of Indian almond leaf and a few strands of java moss into the water. Indian almond leaf has antibacterial properties. It will minimize the chances of bacterial infections and improve the health of the tadpoles. It will also stabilize the pH to stimulate the natural environment for the tadpole.
The java moss serves as a food source and will also produce oxygen. It acts as a filtration with nitrogen uptake. Don’t forget to label your cup with dates and species of your Dart Frog. Note: Do not put multiple tadpoles in one cup. Many species are cannibalistic and will eat each other. Keeping your tadpoles in individual cups will lower stress on them and ensure that they are getting the proper feeding they need for their development.
You can increase the water level in the cup after a few days by simply adding more RO-water. When the tadpoles first emerge out of their egg, they do not need to be fed right away. They are still absorbing the egg sack for their nutritional needs. Once the egg sack has completely been absorbed do not over feed the tadpole. Feed only up to 1 bite a few times a week and keep the tadpole temperature between the low to mid 70 degrees. Water pollution is the fastest way to kill your tadpoles. Be patient as the tadpole develops. Add more water as it evaporates (RO Water or De-chlorinated Water).
After approximately 6-8 weeks, depending on the temperature and diet, the tadpole will develop visible back legs. Another month later, the front legs will develop. The fact is that the front legs actually develop at the same time as the back legs in frogs, but they don’t emerge until much later. Once all four legs are visibly developed, our Dart Frog is ready for its final metaphases.
With his tail still visible and all four legs developed, the tadpole stops eating. They don’t need to be fed anymore because they are absorbing their tail for their nutritional needs.
Help Them Out Of Water
This stage of the metaphase is the most crucial stage for the Dart Frog. In the wild, the parents drop off their offspring in very shallow water so that when the tadpole reaches this stage, it can simple crawl out of the water to reach land. In captivity, we must lower the water and provide land area to aid in their final stage.
Simply lower the water that the tadpole is in, and tilt the cap at a 45-degree angle. Cover the cap with a vented cup lid so the frog does not escape.
The tadpole / froglet will spend some of its time in water and some of its time on land. This is all part of its development. When it finally decides to live on land, it has finished its final stage from tadpole to froglet. Transfer the froglet to its growing and observation tank. No feeding is necessary until the entire tail is 100 percent absorbed.
Caring for Froglets
This stage ranges from OOTW (out of the water) stage to about two months old. They range from one half inch to three quarters of an inch in length. They are just babies so they are often shy. They are at the stage where they are just beginning to learn how to hunt for food. It is important at this stage to provide an abundance of springtails and smaller fruit flies such as Melanogaster. Hydei will be too big for them at this time. Froglets have very high metabolism. It is very important to make sure that there is an ample amount of food for them. Dust the fruit flies with multi-vitamins and D3 at least 4 times a week. Feed them daily. Observe and make sure that they are putting on weight. Feeding them twice a day might even be necessary. It important not to overfill their habitat with flies at one time. It can cause stress to the froglets. Their enclosure can be very simple. A 10 gal tank or sweaterbox / shoebox with moist sphagnum moss, a couple of large magnolia leaves and a shallow water dish will suffice. Remember, once the tadpole loses its tail, it cannot swim. They can drown in a deep dish of water. Normal misting and temperature control is important. A small group of froglets from different species can be kept in the same enclosure, but do not over crowd them.
All written content of the DFC Learning Center is gathered from various readings, forums, websites, Dart Frog enthusiasts, hobbyists, the Dart Frog community and our own DFC Dart Frog specialists. Please share any content from the DFC Learning Center freely, to further the education and knowledge of Dart Frogs.
Thank you,
- The DFC Team
Caring For Dart Frog Tadpole To Adults
This is general care for raising you Dart Frogs from tadpoles to adults. Some species may require specific care. This care sheet does not apply to Obligates.
Tadpoles:
When the tadpoles first emerge out of their egg, they do not need to be fed right away. They are still absorbing the egg sack for their nutritional needs. Once their egg sack has been completely absorbed (typically about 24 to 36 hours) they can be fed. At DFC, we recommend DFC Tadpole food and black water extract or Indian almond leaves. Do not over feed the tadpole. Only feed up to 1 bit a few times a week. Water pollution is the fastest way to kill your tadpoles.
Froglets:
This ranges from OOTW (out of the water) stage of the baby frog to about two months old. They range from sizes of one-half inch to three quarters of an inch in length. They are at the stage when they are just beginning to learn how to hunt for food. It is important at this stage, to provide an abundance of springtails and smaller fruit flies such as Melanogaster. Hydei will be too big for them at this time. Froglets have a very high metabolism. It is very important to make sure there is an ample amount of food for them. Dust the fruit flies with multi-vitamins and D3 at least 4 times a week and feed the froglets daily. Observe and and make sure they are putting on weight. Even feeding them twice a day might be necessary. It’s important not to overfill the habitat with flies. It can cause stress to the froglets. Their enclosure can be very simple: a 10 gallon tank or sweaterbox / shoebox with moist sphagnum moss, a couple of large magnolia leaves and a shallow water dish will suffice. Remember, once the tadpole loses its tail, it can not swim. They can drown in a deep dish of water. Normal misting and temperature control is important. A small group of froglets from different species can be kept in the same enclosure, but do not over crowd them.
Juvenile Dart Frogs:
Juvenile Dart Frogs are about 2 months to around 6 months old. At this stage, they will become bolder and bigger, reaching just about 1 inch to 1 ¼ of an inch. It is important to keep their enclosure still simple. This way you can monitor their eating behavior and health. Depending on the size of your Juvenile Dart Frogs, you may be able to start feeding them Hydeii. Mixing Melanogaster and Hydeii is perfectly fine. In fact, it is recommended to help juvenile transition into the larger fruit flies. (For smaller species of Dart Frogs like thumb nails, Melanogasters and springtails should be maintained as their diet. Hydeii will be too big for them.) Continue to dust the flies with minerals and supplements at least 4 times a week. Remember to mist their habitat once a day and do not over saturate your Dart Frog’s habitat. It can increase the chance of bacterial infection.
Juvenile Dart Frogs can grow very fast, therefore requires a lot of feeding. Monitor their growth closely and increase feeding amount when necessary.
Sub Adults:
Sub adults are from this age to about a year old. Adult frogs are typically over a year old and able to be sexed. At this stage, the Dart Frogs are bold and strong. They are suitable for your vivarium. Keep in mind when purchasing any Dart Frogs, a quarantine period is still recommended. Depending on the health of the Dart Frog, the feeding regiments can vary from once a day to every other day. Isopods of various sizes can be introduced to their diet. Some larger species like the Phylobates terribills, or Phylobates bi-color can consume medium crickets and firebrats. Dusting minerals and vitamins can be limited to 3 times a week.
All written content of the DFC Learning Center is gathered from various readings, forums, websites, Dart Frog enthusiasts, hobbyists, the Dart Frog community and our own DFC Dart Frog specialists. Please share any content from the DFC Learning Center freely, to further the education and knowledge of Dart Frogs.
Thank you,
- The DFC Team
Cultivating Fire Brats
Thysanuras: Silverfish And Firebrats
There are 18 species of Thysanura, which are a primitive group of wingless insects. Two of the most common are Silverfish (Lepisma saccharina) and Firebrats (Thermobius Domestica). They have been in existence even before cockroaches. The two have long and slender bodies that are broader at the frontend and gradually taper at the rear - much like a carrot shape. The difference between the Silverfish and Firebrat is their color. Silverfish have silver hair-like scales that cover the body making them a silvery or pearly gray color while Firebrats have more a gray color with spots and dark lines across the body.
The common Firebrat is up to 10mm in length. They have mandibles that can remove the sizing of paper in books, magazines and even wallpaper. Their preferred temperature range is 72 to 80 degrees F. The Firebrat can live for as long as two years and molt up to 50 times during this period. Firebrats are nocturnal - hiding in the daytime and become active in the dark. They will quickly retreat back into hiding when lights are turned on.
Although they are considered as pests in our environment, Firebrats are a great food item for many larger species of Dart Frogs. Firebrats are slow at breeding and not very productive, but it is definitely worth your while to reproduce them to provide diverse food options for your Dart frogs.
Breeding Firebrats
To breed firebrats, transfer the starter culture to a larger tight container. Put half an inch of wheat bran in the container as a substrate. Fill the container with egg crate and add some lumps of cotton wool for egg laying. Feed the firebrats a couple of times per week with fish flakes, or springtail chow. It is important to keep the humidity low. Firebrats need it warm and dry. They do not drink but need a small cup with just a little water in the bottom. Make sure to cover the cup with tight mesh, or the firebrats will drown.
For breeding, Firebrats need dry heat around 95 - 105 degrees Fahrenheit. A boiler room is the perfect place to breed them. One generation takes 3-6 months depending on temperature and food quality. It is a long wait, but when you have a couple of cultures going, you can feed your Dart Frogs with them at least once a week. If you need newborns, take out the egg-filled cotton wool and put it in a separate container.
Firebrats can also be a great treat for other larger frogs, predatory invertebrates, salamanders and small lizards.
All written content of the DFC Learning Center is gathered from various readings, forums, websites, Dart Frog enthusiasts, hobbyists, the Dart Frog community and our own DFC Dart Frog specialists. Please share any content from the DFC Learning Center freely, to further the education and knowledge of Dart Frogs.
Thank you,
- The DFC Team
Intro for Bromeliads
There are over 3,000 different species of Bromeliads. There are many ways to care for a bromeliad, as there are different varieties. In the wild bromeliads are adapted to withstand drought but cannot survive root rot that comes from being overwatered. Keep this in mind as you plant them in your vivarium. Bromeliads have a wide range of tolerance for light. Some varieties prefer bright light while others thrive in almost constant shade. However, the more light a bromeliad is exposed to, the more colorful they become.
Bromeliads will not only make your terrarium come to life, but a number of dart frog species rely on them for tadpole deposits as well as for egg laying sites and hiding places.
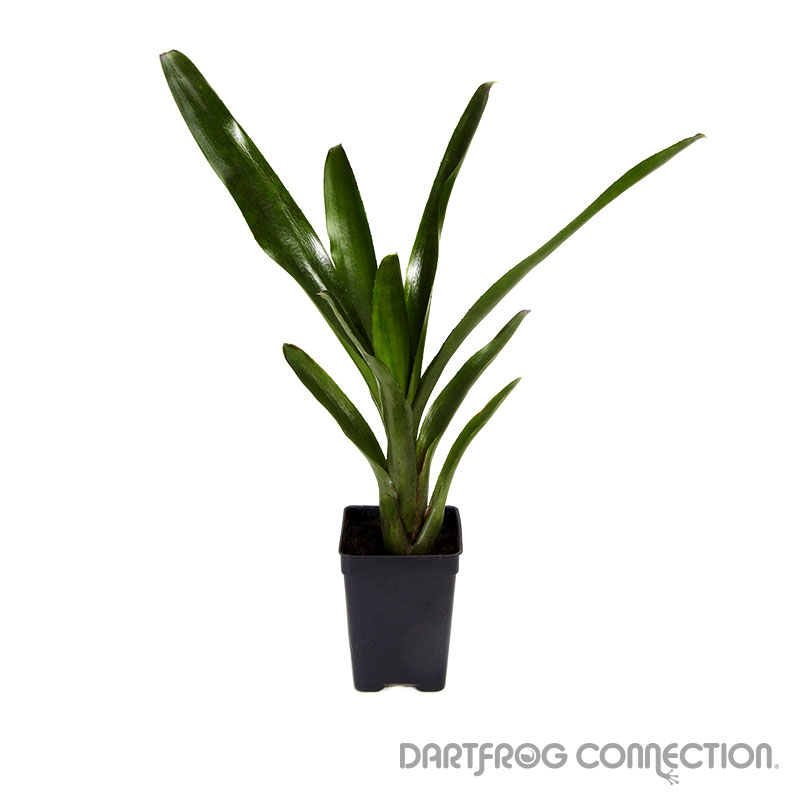
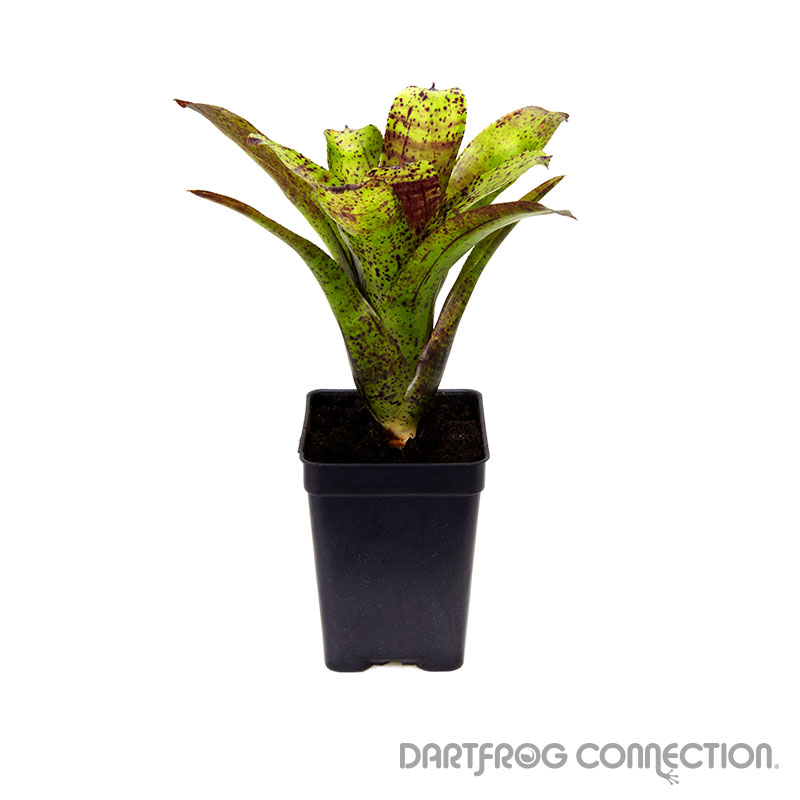
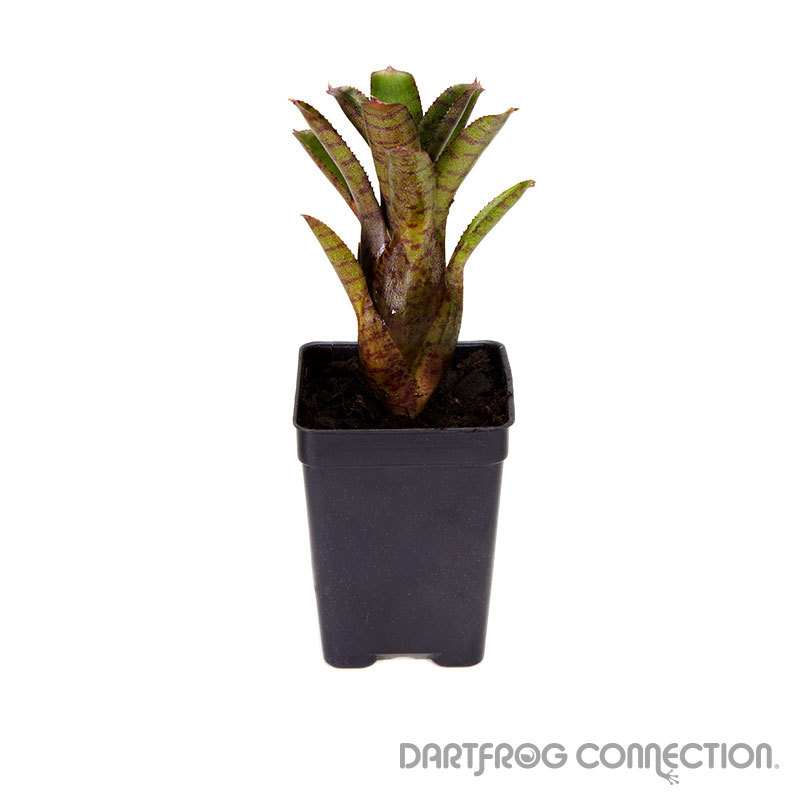
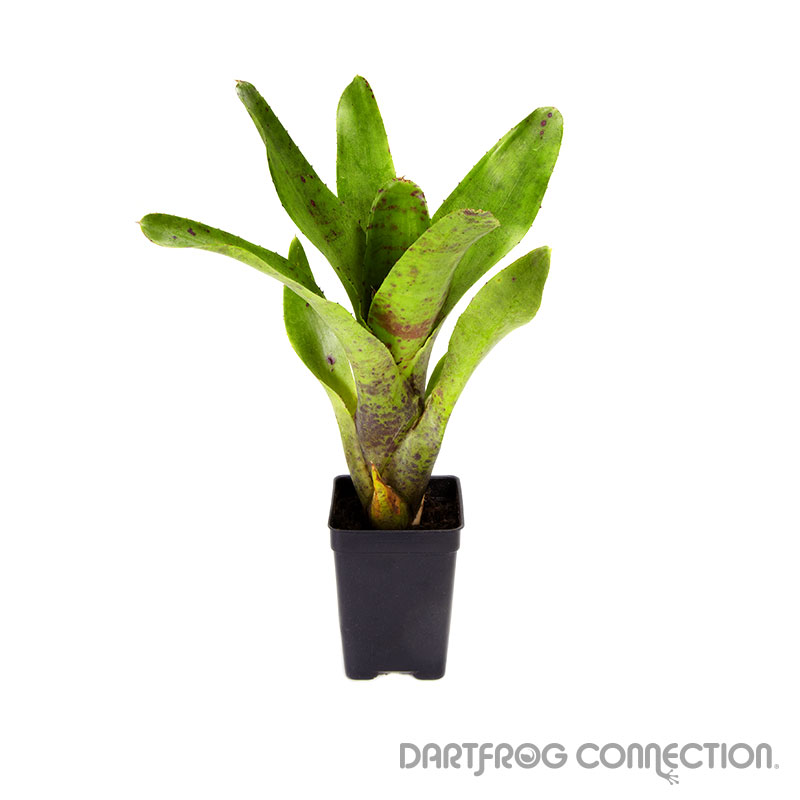
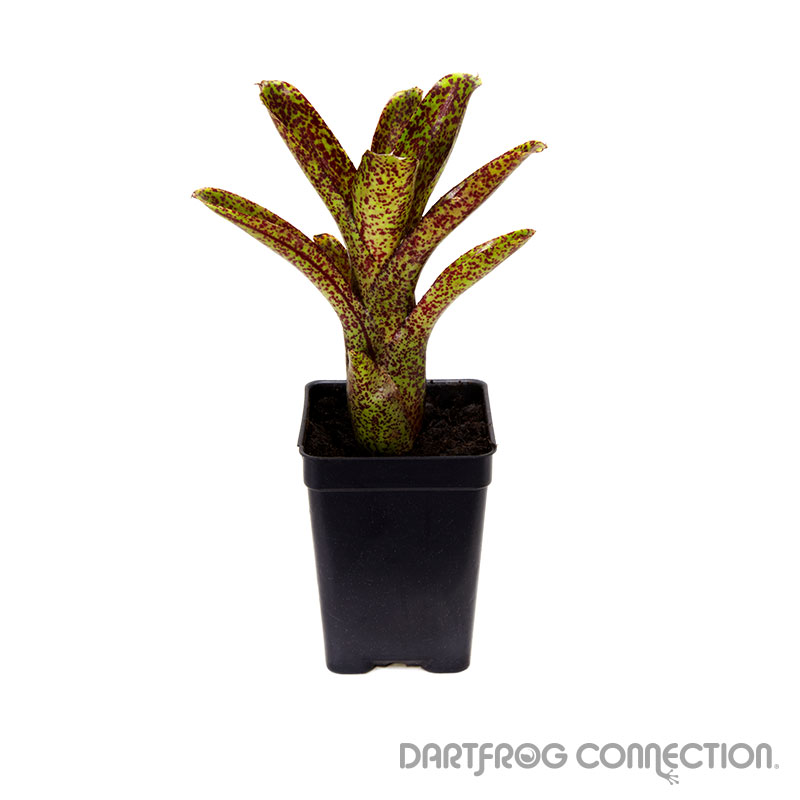
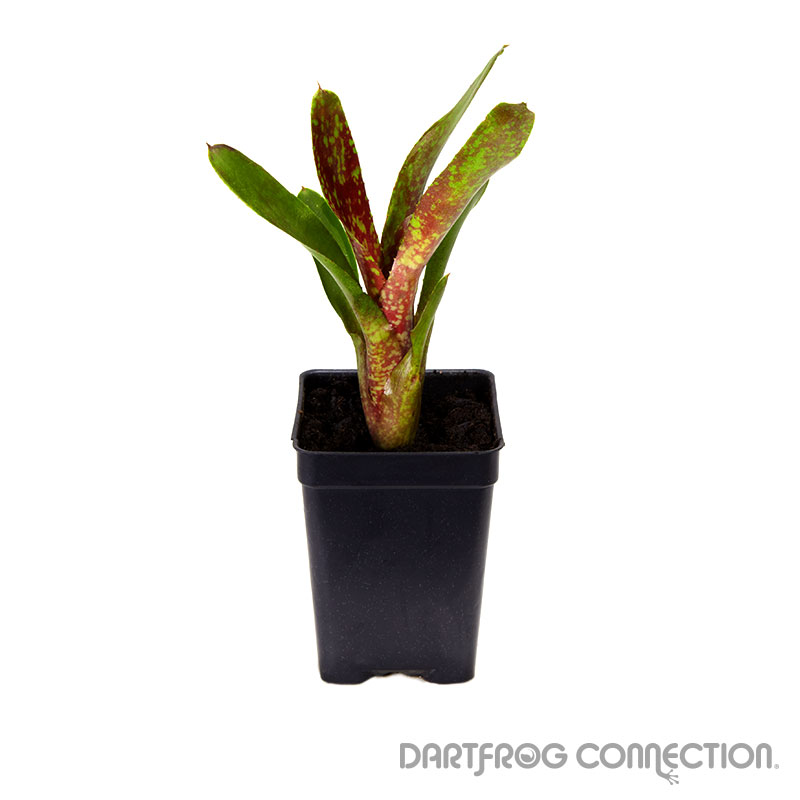
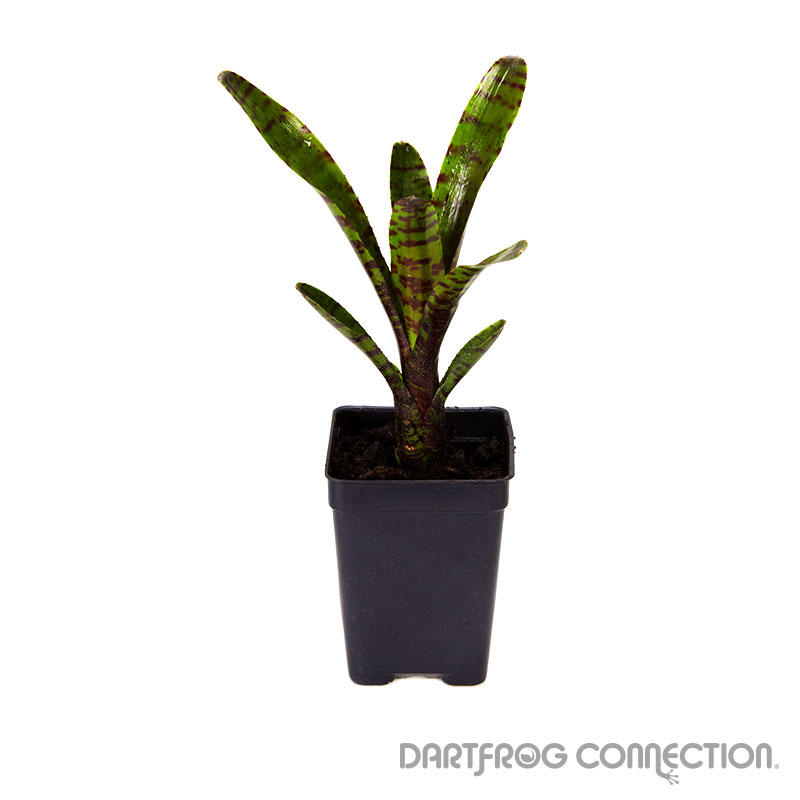
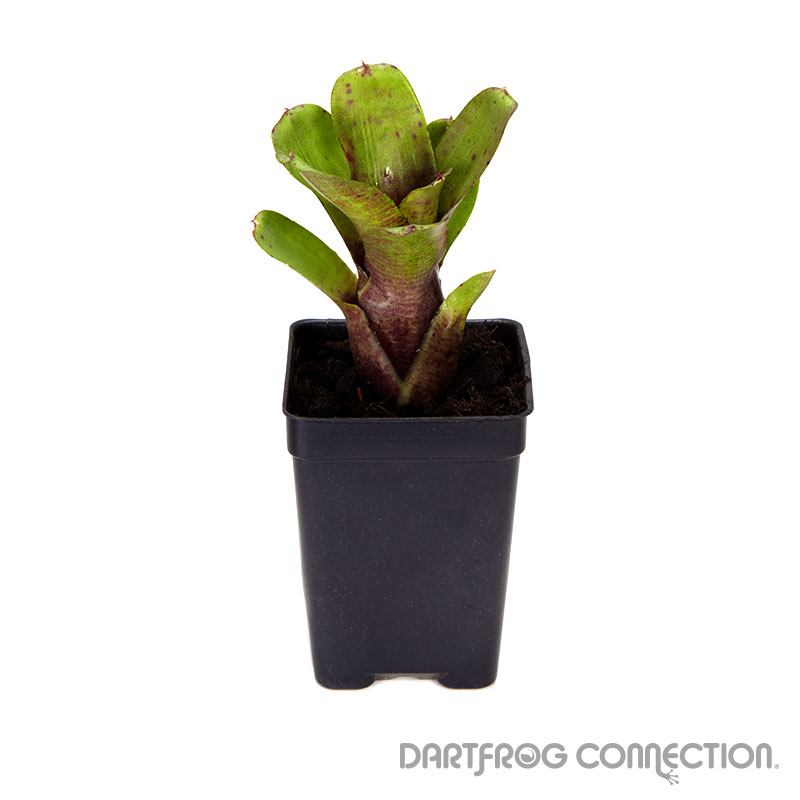
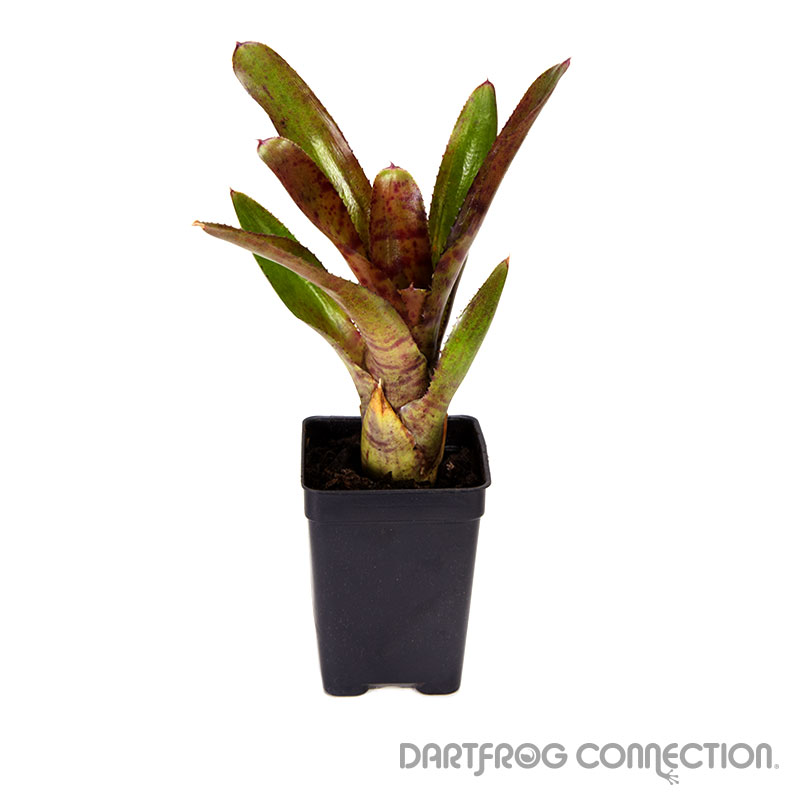
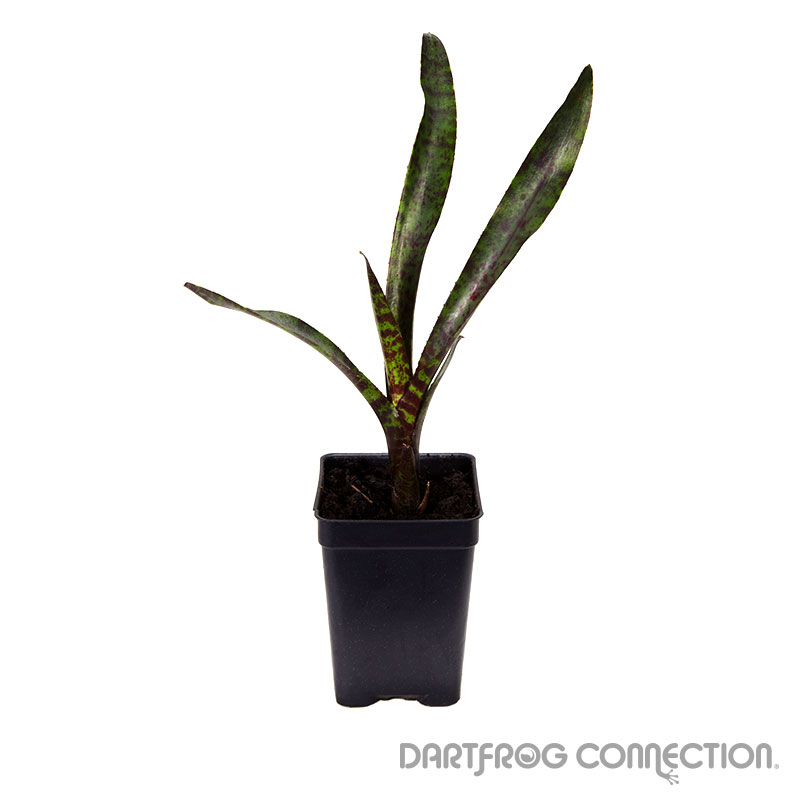
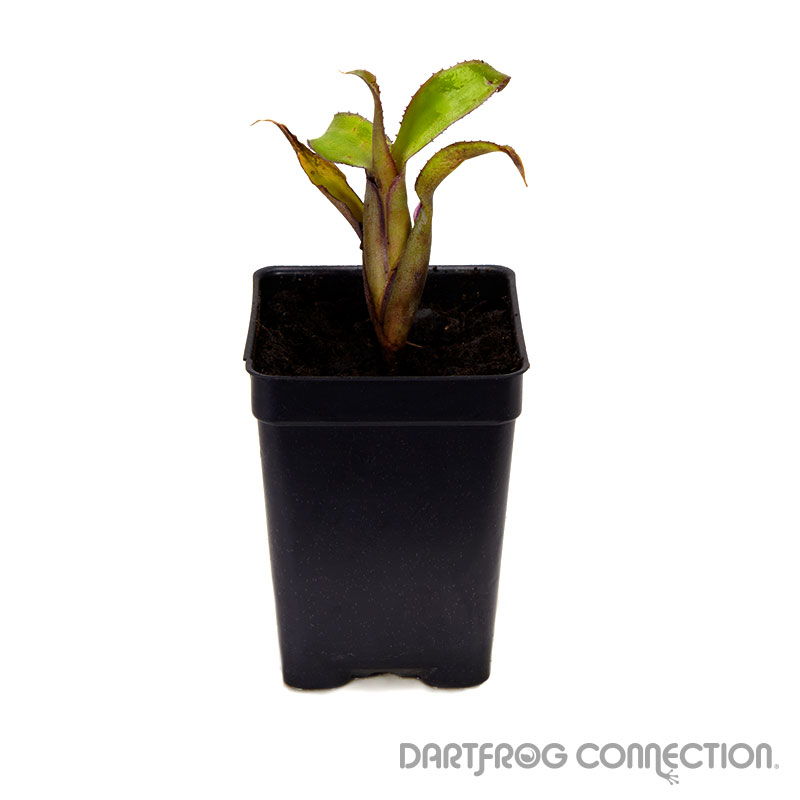
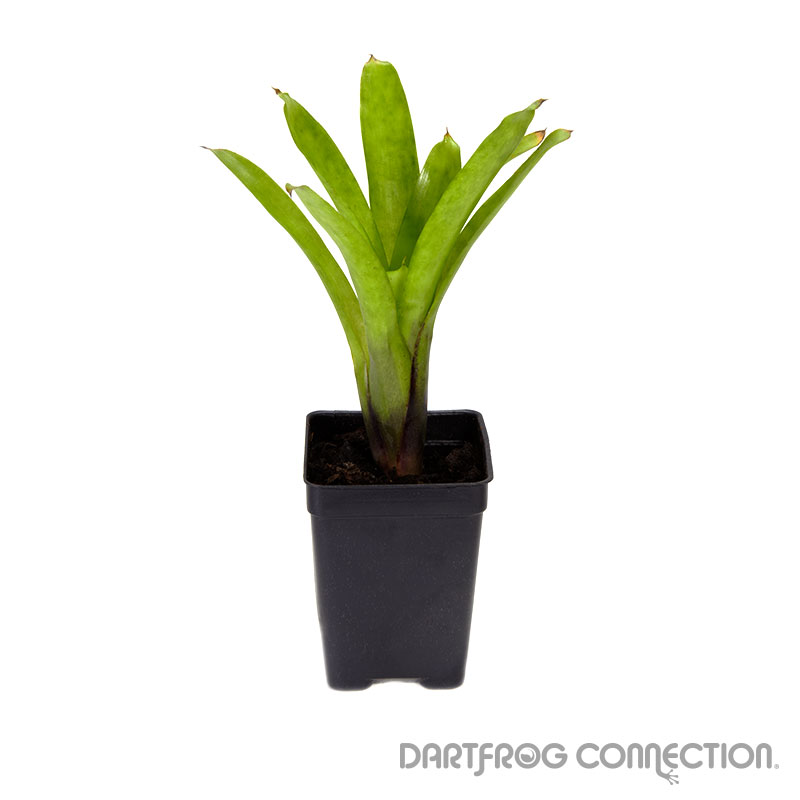
Neoregelia bromeliads are the best species for dart frogs. Other species of bromeliad will be just as suitable to build and grow your own natural habitat for your other types of dart frogs.
NEOREGELIA
 'Best of Both
 Shamrock
  Rubrifolia
 Punctatissima
 Olens x Smithii
 Mo Peppa Please
 Little Jewel
 Marlene Goode
 El Gato
 CF Smithii
 Carolina Fireball
 Bric a Brac
 Bloodshot Eyes
 Black Beauty
 Zonata
AECHMEA
 Brevicollis
 Astrid
 Organesis
 Recurvata x Calyculta
VRIESSA
Taking Care Of Your Bromeliads
Bromeliad is an Epiphytic plant. These plants can grow without soil. They are perfectly suited for the dart frog lover’s vivarium. There are over 3,000 different species of Bromeliads. They care is all about the same. Bromeliads will not only make your terrarium come to life, but a number of dart frog species rely on them for tadpole deposits as well as for egg laying sites and hiding places.
When a bromeliad plant reaches maturity, it will stop producing leaves and the flower will bloom into a beautiful, unique formation. At this time, the healthy bromeliad become a mother plant and will produce offshoot plants from the base that we called pups.
With proper harvesting of the pups can lead to more beautiful bromeliads and the potential for an ongoing generation of bromeliads for your own vivarium or green house.
What is a Bromeliad pup?
A bromeliad pup is the offset of another bromeliad plant. Once a mature bromeliad reaches the point where it has a healthy flower and a strong core, it will produce pups. We call the original plant, the mother plant.
There can be multiple pups grown at the same time. The pups will grow from the base of the mother plant. The pups will grow as they feed off the original bromeliad. Once removed, eventually, the pups will reach a point where they can be harvested and moved to their own location.
Pups form on nearly all bromeliads. The pups form in much the same way on each of the different varieties. There are some differences including specifically the way the pup can grow from the base of the parent, but for the most part the pups will grow from the base of the parent and can be removed by pulling and tearing sideways from the parent or mother bromeliad.
Harvesting a Bromeliad Pup
Pups will eventually start to grow their own root system next to the mother plant. It’s at this point, when the pup is about one third the size of the mother plant, that is the time for the pup to be harvested.
The pup can be removed from its place at the base of the mother plant. You can peel the pup away from the mother or cut the stem that the pup had the pup is on. It is always good to make sure there are some roots starting to form from the pup. It means the pup is ready to be on its own in a new pot or in the ground depending on where you are planning to set the plant. If there are no roots, you can still harvest, just make sure the bromeliad pup is of good size and plant it right of way.
Often times there will be an outer leaf on the outside of the pup. You can tear this leaf away and reveal the entire base of the pup.
You can do this with all pups on the mother plant if there are multiple. You can replace the soil around the mother plant and a healthy mother plant will continue to bloom and develop even grow more pups in the near future.
Once you have remove the pups from the mother plant, they are own their own. Take care of them the same way you have with the mother plant, soon they too will become mother plants themselves.
Planting a Bromeliad Pup
There is some care necessary when planning a bromeliad pup.
After you’ve harvested your pups from the mother you’ll want to prepare individual pots or areas for planting. You’ll want to make sure the new plant is placed in a shallow bed of soil with room for the roots to grow down. This way of planting will leave the pup plant a little top heavy so be sure to set the plant well so it’s balanced.
You can use wood sticks or stakes to hold the plant up until it reaches a level of root quality to withstand its own weight. This is a crucial period for the bromeliad pup. The roots may or may not have grown, but either way the roots will not be able to withhold the top weight of the pup. After some time the roots will form and you’ll have a healthy bromeliad pup that can sustain on its own without the support. It can be very rewarding at this point to know you’ve successfully transferred and planted your own bromeliad pup.
Caring for a Bromeliad Pup
Once the bromeliad pup is transferred there are a few steps to take to ensure its success. We’ve already mentioned that you’ll probably need to prop up the top of the plant with wooden spikes or stakes. These will support the plant as it grows its roots, which will later support the weight of the leaves and the base of the bromeliad. You can tell the plant is ready to grow on its own by giving a slight pull on the plant. If there is resistance you’ll know the roots have taken hold in the soil and will be able to support the plant. You’ll have to judge a little from your own experience if there is enough support in the root system to support the weight of the plant.
As the pup grows it will becomes more stable with its roots system. At this time you can remove the supports.
Taking a bromeliad from the pup stage to the full maturity stage is very rewarding. It’s a process that can be repeated over and over. With proper care it can be a great way to slowly build your collection and continue fostering a beautiful vivarium for generations. With a few proper steps you’ll be able to effortlessly take pups from their mothers to their own pots and have them blooming and looking wonderful in a short period of time. The entire process of the bromeliad pup takes about a year to two years to transpire. It’s a very rewarding process for any gardener and bromeliad and dart frog enthusiast.
Sources
BSI.org (http://www.bsi.org/)
All written content of the DFC Learning Center is gathered from various readings, forums, websites, Dart Frog enthusiasts, hobbyists, the Dart Frog community and our own DFC Dart Frog specialists. Please share any content from the DFC Learning Center freely, to further the education and knowledge of Dart Frogs.
Thank you,
- The DFC Team
Care Sheet for DFC's Fruit Fly Cultures
Due to different temperatures and rough handling by various shipping carriers, some damage to the DFC fruit fly cultures can occur. This is a common issue throughout the dart frog community. We at DFC do our best at making sure our media is strong enough to handle most shipping processes. However at times, it can be unpredictable.
INFORMATION THAT WILL HELP YOU CARE FOR YOUR NEW ARRIVAL :
• DFC will always ship cultures that are already in the blooming process.
Adult flies may die during the shipping process. Be patient, new flies will emerge from pupae in just a few days.
• Please keep your DFC Live Fruit Fly Culture around room temperature ranging from 75F to 78F and humidity around 60% to 75%.
• Culture can crash if the media dries out, simply add R.O. or filtered water to keep the culture moist.
• Due to hotter conditions during transit, the media can become more fluid and move around. In some cases the media may migrate to the top of the cup. Please place the media cup right side up and allow the culture to settle down again. We know the culture might not look very attractive in this condition, rest assured it will not affect the productivity of the fruit flies.
If you have any other questions about your DFC Live Fruit Fly Culture, please contact us at :
1- 888-996-FROG
We will be glad to assist you.
Thank you for your understanding.
DartFrog Connection Team